Hey, GoProers! No matter you're an entry-level videographer or an old hand at action camera shooting, you must be familiar with FOV, full academic name the field of view. As one of the crucial settings on the small GoPro box, FOV selection determines whether the final picture or video clip is in fisheye (wide angle) or flat visual effect, and how much scenes would be taken into the picture horizontally or vertically.
So what is FOV exactly? Is there any restriction on FOV usage? If so, when FOV is available to choose on GoPro? What's the best FOV setting for different filming scenarios? Let's just make all those stuff clear in this post.
Simple Explanation on GoPro FOV
FOV, abbreviations of the field of view (or vision), literally means the open observable area a person can see through eyes or via other devices. While GoPro field of view surely refers to the range of visible world through GoPro lens at a certain spatial location, which will be recorded once you tap the shutter.
Since the sensor size of GoPro facilities may differ from each other, your GoPro field of view degrees may vary even applying the same FOV setting when capturing the image, ranging from 29.3° to 149.2° at horizontal, vertical, or diagonal degrees.
Five GoPro FOV Options
It's easy to find out FOV option on your GoPro model under the Resolution and FPS menu. And newer GoPro models allow you to do smarter FOV settings by simply double tapping on the LCD screen. Regardless of your camera models, there are five GoPro FOV options in total, two of which are born with fisheye effect while three others are not. Let's take a detailed look at them one by one.
1. SuperView FOV
SuperView captures the largest amount of scenes ever, outputting stunning and nature fisheye visual effect by stretching vertical 4:3 content into full-screen 16:9 automatically. As the "world's most immersive FOV", it's recommended for a tripod, body-or gear-mounted, and other fixed position shots, especially when the subject is close to the lens. Following HERO 3 Black Edition, the later HERO 4, 5, 6, 7, 8, 9,10 models all support shooting certain video at SuperView field of view.
2. (Ultra) Wide FOV
Wide FOV is a basic and also the default view option for all HERO cams, which was named as Ultra Wide FOV on early GoPros. It's the second largest field of view with a fisheye look around the edge after SuperView. Similar to SuperView, Wide also works great on POV (point of view), selfie and action shots.
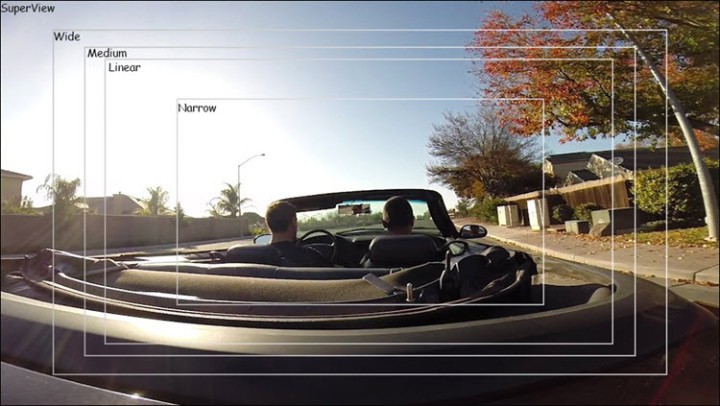
3. Medium FOV
As the name shows, it's a mid-range FOV which puts more focus on the center of the shot. No fisheye here but zooming in effect on the center of the shot. It's often used for scenery shooting.
4. Linear FOV
Another mid-range FOV with fisheye distortion effect around Wide FOV mode taken away. It's a new FOV you can only find on HERO 5 or later, and good for filming aerial footage with a drone or other shot in traditional perspective.
5. Narrow FOV
Being the smallest field of view, Narrow is usually used for recording content at a distance. Like Medium FOV, it also zooms in on the center of the shot.
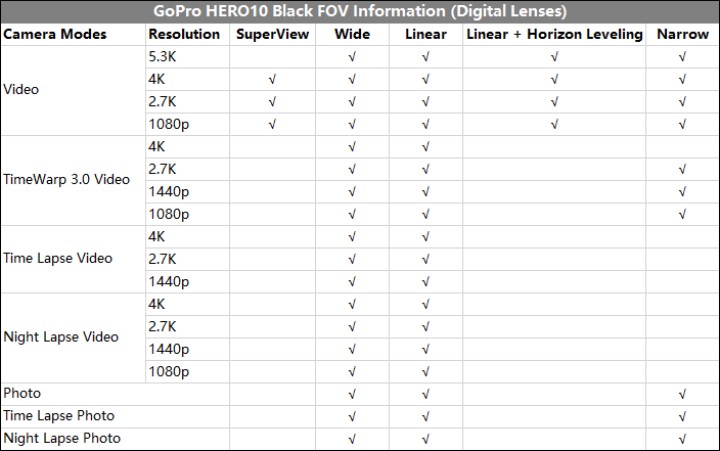
Video Photo FOVs for GoPro HERO 10/9/8/7/6 Black etc.
Although there're five GoPro FOV options, not all cameras provide them all. Even when any FOV is adopted by the cam, it may be still mode-limited, only available for some resolutions or frame rates. So many new users will encounter "errors" like "No Linear mode available on GoPro HEROX", "HEROX Superview Setting gone" etc. Let's check video photo FOV options from HERO 3 to 10 and best GoPro FOV setting for activities below.
Update:
GoPro released HERO10 Black, the successor to the HERO9 Black on September 16, 2021. The FOV information of the latest GoPro HERO10 Black is also updated below.
GoPro HERO10 Black FOV Information (Digital Lenses) >
The following is the FOV information of earlier models of GoPro HERO.
- GoPro HERO9 Black FOV Information (Digital Lenses) >
- GoPro HERO8 Black FOV Information (Digital Lenses) >
- GoPro HERO7/6/5/4/3 FOV Information >
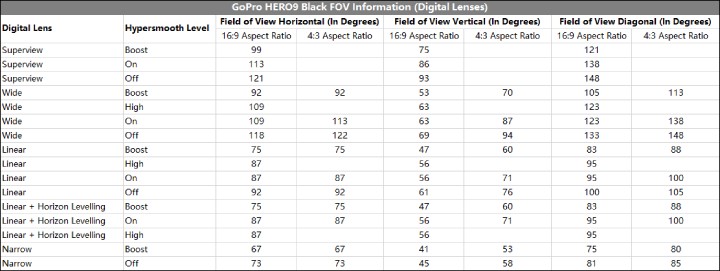
GoPro HERO9 Black FOV Information (Digital Lenses)
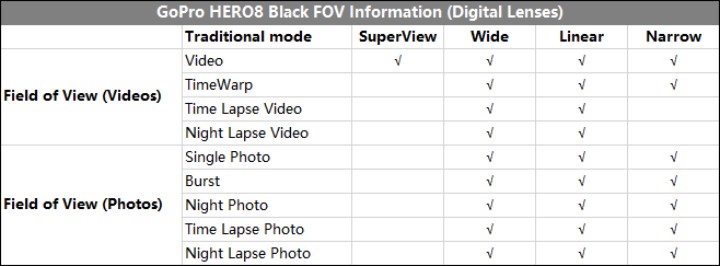
GoPro HERO8 Black FOV Information (Digital Lenses)
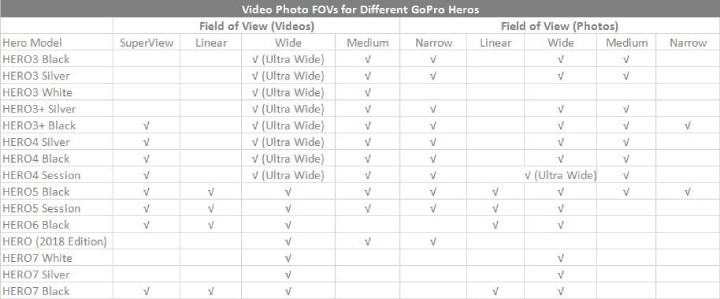
GoPro HERO7/6/5/4/3 FOV Information
How to Choose FOV & Best FOV Settings for Activities
It is front and center to define a FOV that suit the scene best. Generally, if you are meant to shoot in wider areas in the framing for fisheye looking or easier post-production, either SuperView or (Ultra) Wide FOV is OK. If you are doing a distant shot and prefer produce a steady video or have picture zoomed in, Medium and Narrow FOV are far more appropriate. Linear mode is often used in aerial drone or building photography.
Best FOV Settings Recommendation for GoPro HERO10/9/8/7/6 Black
Best Video FOV Settings |
Best Photo FOV Settings |
|
|---|---|---|
 Family/Travel |
1080p60, Wide FOV 4K60, Wide FOV 10x TimeWarp Video (HERO7 Black) |
Photo, Wide FOV Continuous photo, Wide FOV |
 Cycling, Mountain Biking |
1080p60, SuperView FOV 1440p60, Wide FOV 2.7K60 4:3, Wide FOV 15x TimeWarp Video (HERO7 Black) |
Time Lapse Photo (2-second Interval for HERO6 and 10-second for HERO7), Wide FOV |
 Motorcycle, Motocross |
1080p60, SuperView FOV 1440p60, Wide FOV 2.7K60 4:3, Wide FOV 15x TimeWarp Video (HERO7 Black) |
Time Lapse Photo (2-second Interval for HERO6 and 5-second for HERO7), Wide FOV |
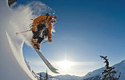 Skiing, Snowboarding (non-POV) |
1080p120/240, Wide FOV 4K60, Wide FOV 2.7K120, Wide FOV 15x TimeWarp Video (HERO7 Black) |
Burst (30/3 Rate), Wide FOV Photo, Wide FOV | Continuous photo, Wide FOV (HERO6 Black) Time Lapse Photo (1-second interval), Wide FOV (HERO7 Black) |
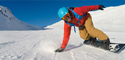 Skiing, Snowboarding (POV) |
1140p60, Wide FOV 2.7K60 4:3, Wide FOV |
Time Lapse Photo (0.5-second Interval), Wide FOV Burst (30/3 Rate), Wide FOV |
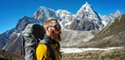 Hiking |
1440p30, Wide FOV 4K30 4:3, Wide FOV 15x TimeWarp Video (HERO7 Black) |
Time Lapse Photo (5-second Interval), Wide FOV Photo, Wide FOV |
 Surfing |
1080p240, Wide FOV 1440p120, Wide FOV |
Time Lapse Photo (5-second Interval), Wide FOV Burst (30/6 Rate), Wide FOV |
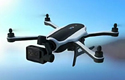 Flying the Karma Drone |
1080p60, Linear FOV 4K60, Wide FOV |
Time Lapse Photo (2-second Interval) Photo with RAW Format setting on |
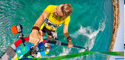
 Underwater Activities |
1080p60, Wide FOV 1440p60, Wide FOV 4K60, Wide FOV |
Time Lapse Photo (2-second Interval), Wide FOV |
 Water Activities |
1440p60, Wide FOV 1080p240, Wide FOV |
Time Lapse Photo (5-second Interval), Wide FOV |
Roundup
If possible, try different FOV settings though under various shot environments! You will find your favourite one and become a smart FOV chooser. Of course, in some cases, you have to turn Protune on to enhance quality by adjusting white balance, ISO, color capture, exposure value compensation (EV) and sharpness.
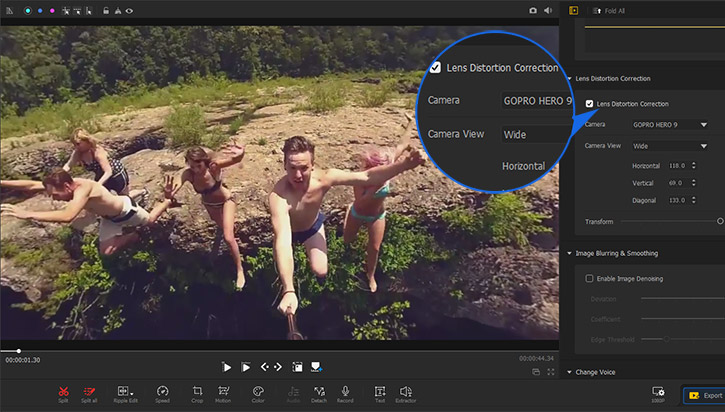
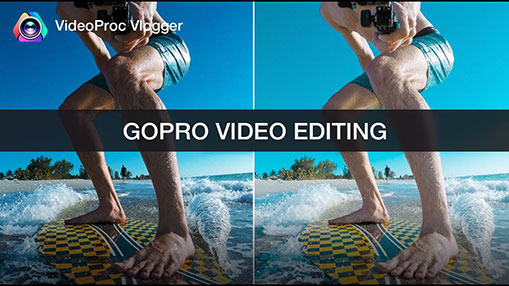
VideoProc Vlogger is one of the best free GoPro video editors if you want to correct the fisheye effect from GoPro (SuperView or Wide FOV) video.
VideoProc Vlogger - Correct Fisheye from GoPro (SuperView or Wide FOV) Video
- Smart Lens Distortion Correction feature built in to help correct fisheye lens distortion in clicks.
- Decrease or defish wide-angle effect from GoPro video without compromising quality.
- Real-time preview available when adjusting correction values of related pamameters.
- More features designed for action cameras: color grade and correct for low light GoPro footage, create camera movements and speed ramps for stunning visual effects.

Step 1. Launch VideoProc Vlogger and load your GoPro footage to the Media Library by clicking the + icon on the interface.
Step 2. Drag and drop the footage to the Video Track in the timeline.
Step 3. Click on the video clip in the timeline to select it, then check the Lens Distortion Correction option in the editing panel on the right side.
Step 4. Choose corresponding camera type and camera view or keep the default. You can also drag the Transform slider to adjust the lens (optional).